
How to get Facebook Pixel: Getting Facebook Pixel set up on your website is one of the smartest things you can do if you want to improve your Facebook ads and really understand what people do when they visit your site. But what exactly is Facebook Pixel? Simply put, it’s a tiny piece of code from Facebook that you add to your website. This code helps you track the actions visitors take, like clicking a button, adding something to their cart, or buying a product.
Why does this matter? Because with Facebook Pixel, you can see which ads are working, who’s interested in your stuff, and how to show your ads to the right people. It’s like having a little helper that tells you what’s going on behind the scenes.
This article is made just for beginners. If you’re new to Facebook Pixel and feel a bit lost, don’t worry. I’ll walk you through everything step-by-step, in simple language, so you can get your Pixel up and running without stress. By the end, you’ll know how to create your Pixel, install it on your website, check that it’s working, and use it to make your Facebook ads better.
Table of Contents
What is Facebook Pixel?
Let’s break it down simply. Facebook Pixel is a small piece of code that Facebook gives you. You put this code on your website, and it quietly watches what visitors do. It tracks things like:
- Who visits your site
- Which pages they look at
- When they add something to their shopping cart
- When they buy something
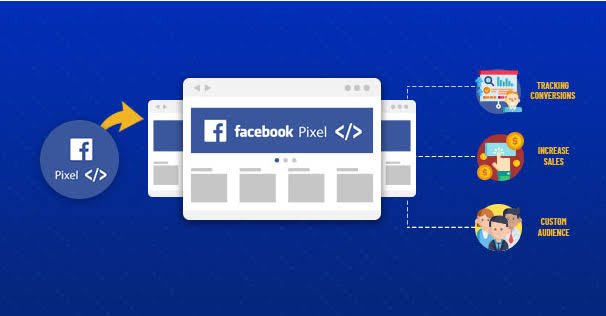
This information is gold because it helps you:
- Make your Facebook ads better by showing them to people who are more likely to be interested.
- Track sales and sign-ups so you know which ads bring results.
- Create special audiences to retarget people who visited your site but didn’t buy anything.
- Measure how well your ads are doing so you don’t waste money.
In short, Facebook Pixel helps you understand your customers and get more from your ads.
Read Next: How to Start a Digital Marketing Business from Scratch in 2025
Prerequisites Before Getting Facebook Pixel
Before you start getting Facebook Pixel, there are a few things you need to have ready. This will make the whole process easier.
Facebook Business Manager Account: This is where you manage your Facebook ads and Pixels. If you don’t have one, you’ll need to create it. It’s free and easy.
Access to Your Website’s Backend or Code Editor: To add the Pixel code, you need to be able to edit your website. If you don’t know how, you might want to ask your web developer for help.
Secure Website (HTTPS): Your website should be secure. That means the URL starts with “https://” not just “http://”. This is important for Facebook Pixel to work properly.
Helpful Tools: Tools like the Facebook Pixel Helper (a free browser extension), Google Tag Manager (for advanced users), and Facebook Events Manager will help you set up and check your Pixel.
Having these ready will save you time and trouble.
How to Get Facebook Pixel
Now, let’s get to the exciting part – how to actually get your Facebook Pixel and add it to your website.
Step 1: Create Your Facebook Pixel
First, you need to create your Pixel inside Facebook.
- Go to Facebook Events Manager inside your Facebook Business Manager.
- Click on “Connect Data Sources”, then choose “Web”.
- Select “Facebook Pixel” and click “Connect”.
- Give your Pixel a name – usually your business or website name works best.
- You can add your website URL if you want, but it’s optional.
- Click “Create”, and your Pixel will be ready.
That’s it! You now have a Pixel, but it’s not working on your site yet. Next, you’ll add it to your website.
Read Next: 50 Best Facebook Posts Ideas for Small Business Owners
Step 2: Install the Facebook Pixel on Your Website
There are a few ways to add your Pixel to your site, depending on how comfortable you are with technology.
Method 1: Add Pixel Code Manually (For Tech-Savvy People or Custom Websites)
If you know your way around website code, this is a good option.
- In Events Manager, choose “Install code manually”.
- Copy the entire Pixel code snippet.
- Paste this code into the “ section of every page on your website. The “ is important because it loads before the page content, making sure the Pixel works everywhere.
- If you use WordPress, you can add this code using plugins like “Insert Headers and Footers” or directly in your theme’s header file.
- For custom HTML sites, just paste it into your HTML files in the “ section.
Method 2: Use a Partner Integration (Best for Beginners)
If you’re not comfortable with code, don’t worry! Facebook works directly with popular website platforms to make Pixel installation easy.
Facebook supports platforms like Shopify, WordPress, Wix, and Squarespace.
For example, if you use Shopify:
- Go to your Shopify admin panel.
- Click “Online Store” > “Preferences”.
- Find the Facebook Pixel section and enter your Pixel ID.
For WordPress, use the official Facebook plugin or other Pixel plugins.
Wix and Squarespace have marketing or integration settings where you can add your Pixel ID.
In Events Manager, select “Use a Partner Integration”, pick your platform, and follow the simple instructions.
Method 3: Use Google Tag Manager (For Advanced Users)
Google Tag Manager (GTM) lets you add and manage tracking codes easily.
- Create a new “Custom HTML” tag in GTM.
- Paste your Pixel code into this tag.
- Set the trigger to fire on “All Pages”.
- Publish your changes.
If you don’t manage your website yourself, you can send these instructions to your developer.
Step 3: Check if Your Facebook Pixel is Working
It’s important to make sure your Pixel is working right after installation.
A. Use the Facebook Pixel Helper Chrome Extension
- This is a free tool you can add to your Chrome browser.
- When you visit your website, the extension will show if your Pixel is active.
- It also tells you if there are any errors or problems.
B. Send Test Traffic to Your Website
- Open your website in a new browser tab.
- Click around different pages to trigger Pixel events.
C. Look at Your Events Manager
- Go back to Facebook Events Manager.
- Check the “Activity” or “Overview” section.
- You should see data coming in.
- Use the “Test Events” tool to see real-time activity.
Step 4: Set Up Facebook Pixel Events (Optional but Helpful)
Events are specific actions you want to track, like:
- When someone buys something
- Adds an item to their cart
- Views a product page
You can set these up using Facebook’s Event Setup Tool without any coding. Tracking events helps you understand what people do on your site and lets Facebook optimize your ads better.
Read Next: Digital Marketing Blueprint: A Step-by-Step Guide to Success
Step 5: Connect Your Pixel to Your Facebook Ad Account
To use your Pixel data in ads:
- Assign permissions to yourself or your team in Business Manager.
- Link your Pixel to your Facebook ad account.
- This way, your ads can use the data to target the right people and improve results.
Common Mistakes to Avoid
Before you finish, here are some common mistakes beginners make when setting up Facebook Pixel:
- Not adding the Pixel code to every page on your website.
- Forgetting to check if the Pixel is working.
- Not setting up events correctly, which leads to bad data.
Avoid these, and your Pixel will work smoothly.
Troubleshooting Common Facebook Pixel Problems
If your Pixel isn’t working, here’s what to check:
Pixel Not Firing
- Make sure the code is in the right place (inside the “).
- Clear your website and browser cache.
- Look for plugins or scripts that might block the Pixel.
Events Not Tracking Right
- Double-check event names and settings.
- Use Facebook’s Event Setup Tool again.
Duplicate Events
- Don’t install the Pixel code more than once on the same page.
- Check for multiple event codes firing for one action.
Read Next: How to Fix Facebook Ad Account Disabled Issue
Conclusion
Facebook Pixel is a simple but powerful tool that helps you get the most out of your Facebook ads. By getting Facebook Pixel set up correctly, you can track what visitors do, improve your ads, and grow your business online.
Follow this guide step-by-step, and you’ll be up and running in no time. Once you’re comfortable, you can explore more advanced features to make your marketing even better. Don’t wait, start using Facebook Pixel today and watch your ads perform better.
Frequently Asked Questions (FAQs)
1. How soon does Facebook Pixel start tracking data?
Usually, it starts right away after installation, but it might take a few minutes to show up in Events Manager.
2. Can I use one Facebook Pixel for multiple websites?
It’s better to create separate Pixels for each website to keep your data clear and accurate.
3. Is Facebook Pixel free?
Yes. Facebook Pixel is free to use. You only pay for the ads you run.
4. What if I’m not good with technology?
No worries. Use partner integrations like Shopify or WordPress plugins, or ask a developer for help. Facebook also has easy guides for beginners.